DIY Burlap Wreath: A Cozy Welcome Home for Fall and Thanksgiving
It seems hard to believe that we are already so close to Thanksgiving and, furthermore, just over a month away from Christmas.
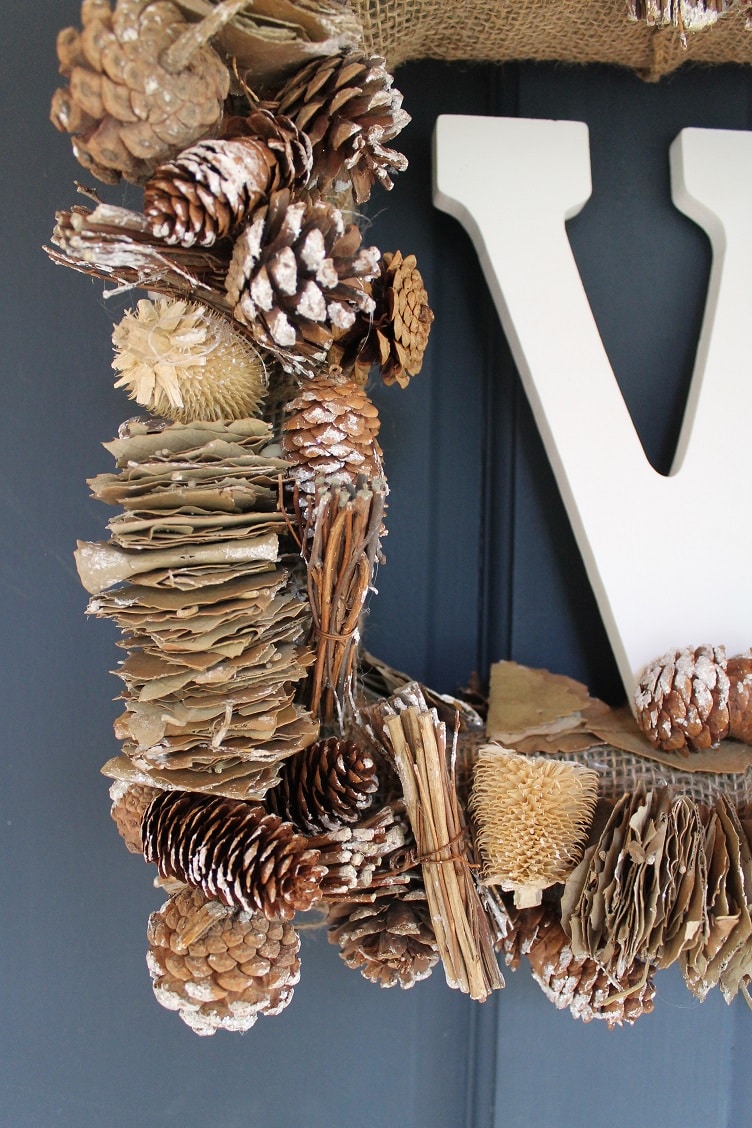
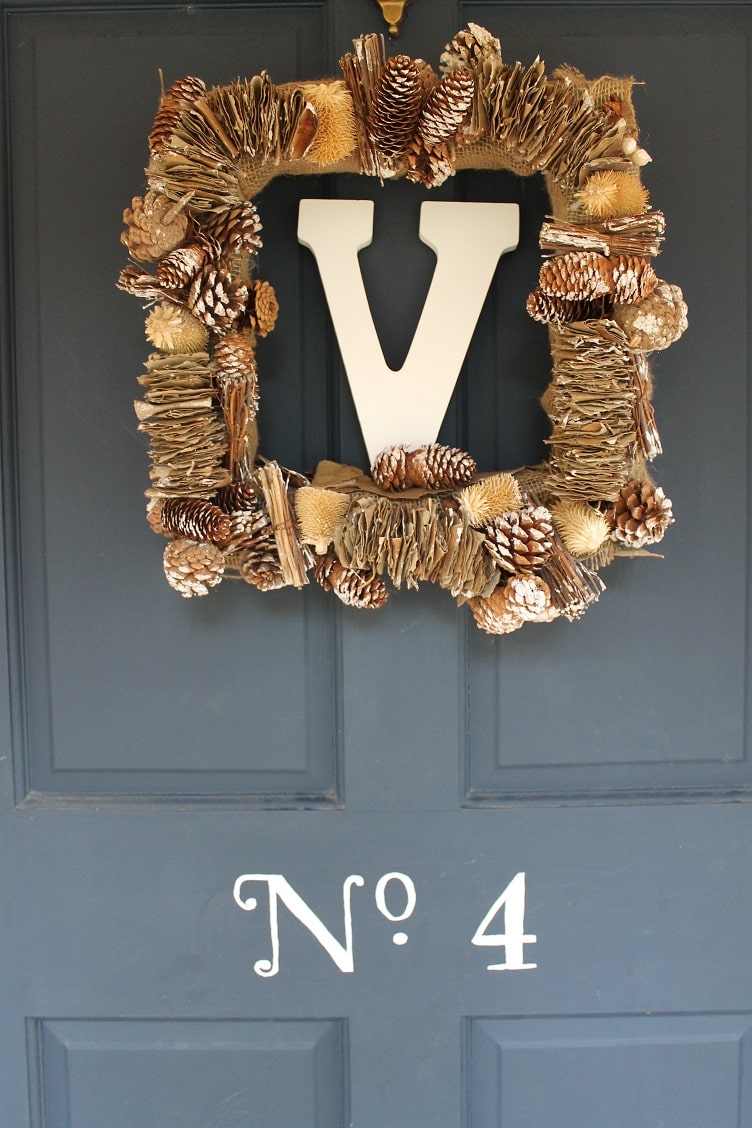
Of course, every year at this time, it’s dark both when we get home from work and when I wake up in the morning. As a result, I always look for something charming, cozy, and uniquely ‘us’ to greet us at the door. Whether it’s after a long day at the office or following a visit with our amazing clients, I want our entryway to feel warm and inviting. Fortunately, this wreath fits the bill perfectly. Additionally, the “V” monogram instantly makes me feel like I’m home. After all, there’s something special about a monogram—it turns any space into something personal. Naturally, it’s the best feeling to return to a home that feels completely cozy and comfortable.
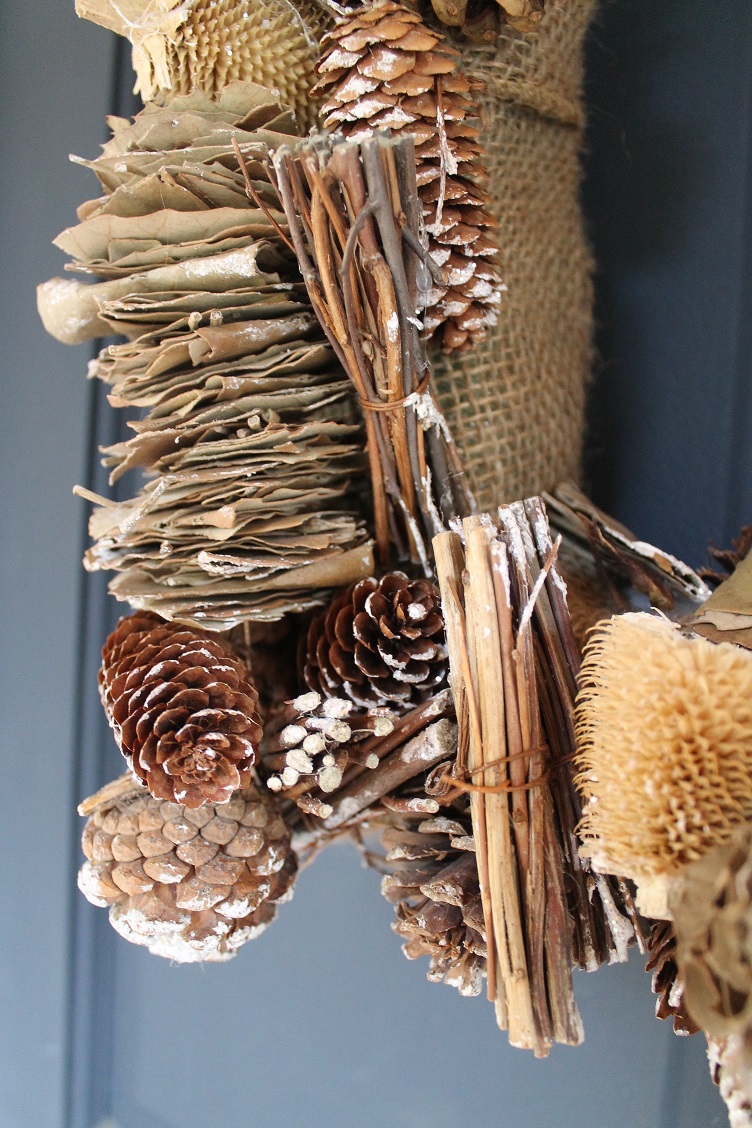
This wreath is crafted from a beautiful garland I picked up at Michael’s. Notably, the mix of dried leaves, twigs, and pinecones makes it far more interesting than a standard pinecone wreath. Furthermore, the rustic elements add depth and texture, which together create that extra layer of warmth and charm we love for the season.
Here’s how to make your own… it’s simple, I promise!
What you need (you can find all of this at Michaels or Joanns):
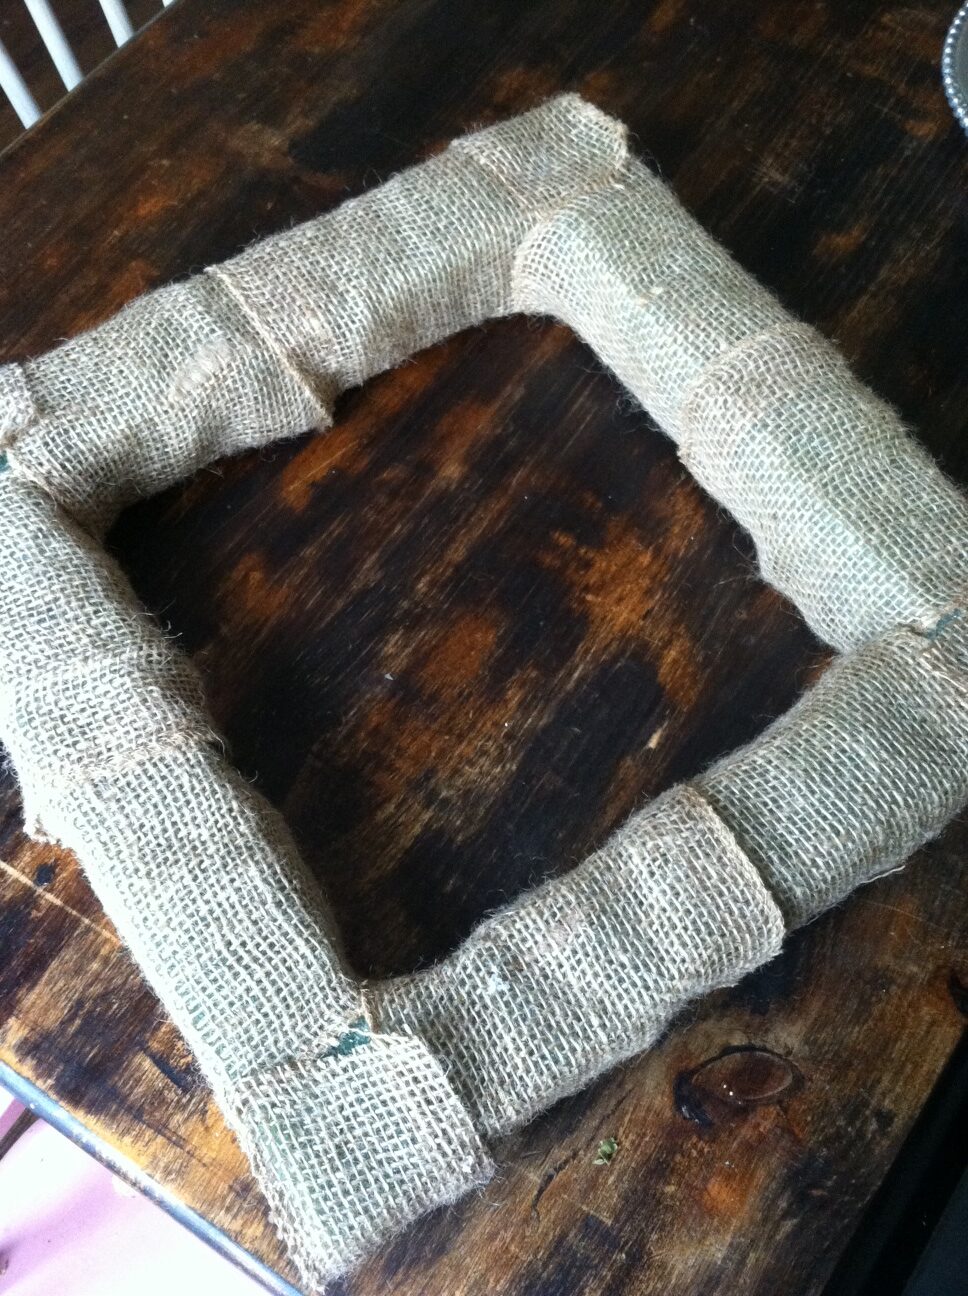
Wreath form
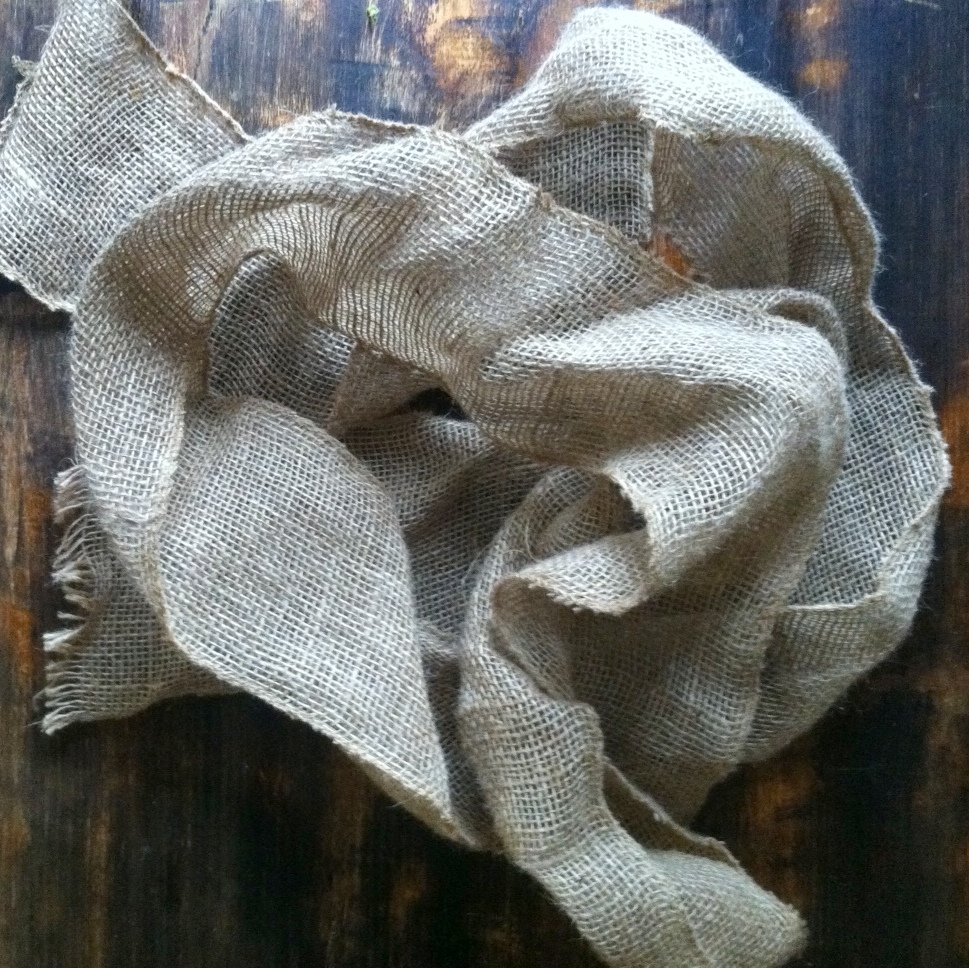
Burlap
Hot glue gun with loads of glue sticks
Pinecone garland
Wooden or Cardboard Letter
Two inches of ribbon
Step One:
Cover your wreath form in burlap by cutting pieces to loop around each section of your wreath form. Secure to the back of the form with your hot glue gun.
frontdoorwreath
frontdoorwreathburlap
Step Two:
Take your garland and start slowly gluing it around the wreath form on the front of the wreath. Make sure to use your glue liberally. You don’t want a wreath with parts falling off on your front door. That definitely doesn’t make your home feel cozy or welcoming.
frontdoorburlapwreath
Step Three:
Most likely, your garland will end up being longer than you actually need. Cut off the end and use some of the extra pieces of the pinecone garland to fill in the bare spots of the wreath. Secure with the glue gun.
Step Four:
Take your two inches of ribbon and hot glue it into an upside down “V”. You’ll use this to hang the wreath to your door. Alternatively, if you have a wreath hanger, you can simply use that instead.
Enjoy your new wreath! I’d love to see photos of any that you make!
burlapfrontdoorwreathfinal
burlapfrontdoorfinal2